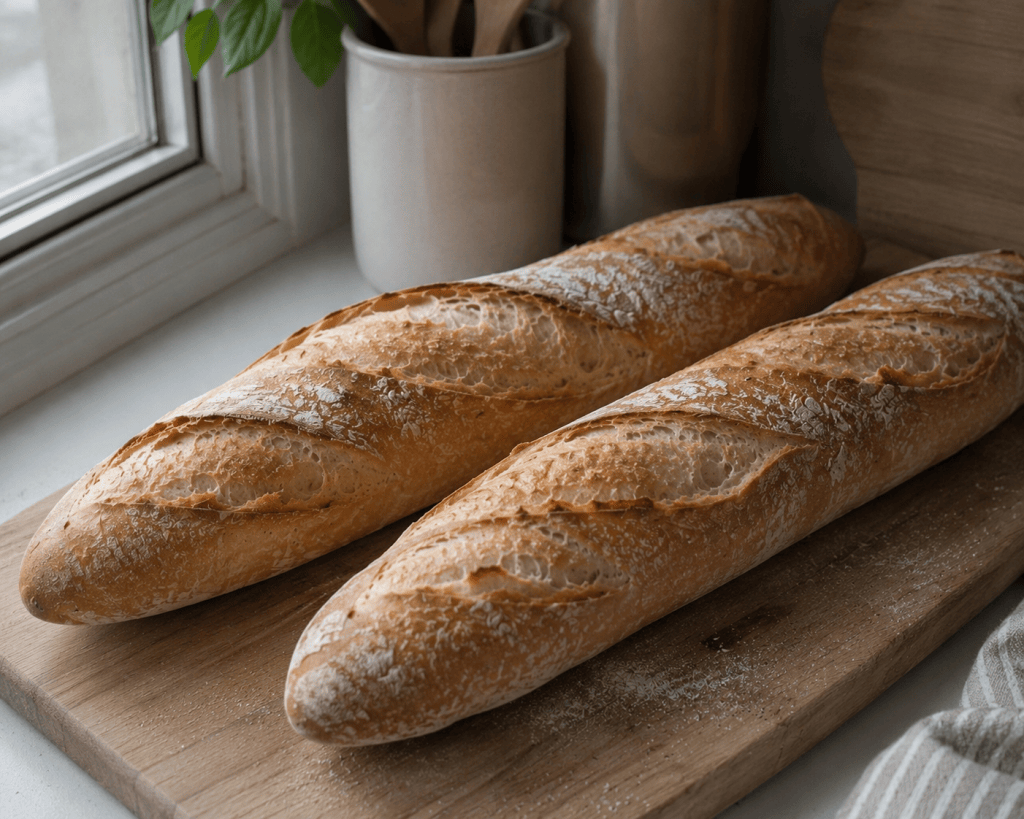
There is something special about pulling a batch of homemade baguettes from the oven. The crust should be deeply golden and crisp, while the inside stays light, tender, and pleasantly chewy.
This homemade baguette recipe uses simple ingredients and a slow rise to develop better flavor without making the process unnecessarily complicated. Steam during the first part of baking helps create the thin, crackly crust that makes a baguette so satisfying.
The dough requires a little patience, but most of the preparation time is hands-off.
Why You’ll Love This Recipe
These homemade baguettes have the contrast you want from bakery-style bread: a crisp exterior with a soft, airy crumb.
The recipe uses only a handful of everyday ingredients and does not require a stand mixer. A longer fermentation develops more flavor than a rushed dough, while careful shaping helps preserve the air created during rising.
They are excellent served warm with butter, alongside soup or pasta, or sliced for sandwiches and crostini.
Ingredient Notes
Bread flour: Bread flour provides enough protein to develop a strong dough with a pleasantly chewy crumb. All-purpose flour can work, but the final texture will be slightly softer.
Yeast: Instant yeast is convenient because it can be mixed directly into the flour.
Water: Use lukewarm water, not hot water. Water around 100°F–105°F (38°C–41°C) works well.
Salt: Salt is essential for both flavor and dough structure. Fine sea salt distributes evenly throughout the dough.
Flour for dusting: Use only as much as necessary during shaping. Adding excessive flour can make the dough dense.
Recipe Details
Prep Time: 30 minutes
Rising Time: 2 hours 15 minutes
Bake Time: 22–27 minutes
Total Time: About 3 hours 15 minutes
Yield: 2 baguettes
Ingredients
- 3¾ cups (450 g) bread flour
- 1½ cups (355 ml) lukewarm water
- 2 teaspoons (7 g) instant yeast
- 2 teaspoons (10 g) fine sea salt
- Extra flour, for dusting
Instructions
1. Make the Dough
Add the bread flour and instant yeast to a large mixing bowl and stir to combine.
Pour in the lukewarm water and mix with a wooden spoon or dough whisk until no large pockets of dry flour remain.
Add the salt and continue mixing until a rough, sticky dough forms.
The dough will look somewhat uneven at this stage. Avoid adding extra flour simply because it feels sticky.
Cover the bowl and allow the dough to rest for 20 minutes.
This short rest gives the flour time to absorb the water and makes the dough easier to work with.
2. Develop the Dough
With slightly damp hands, grab one edge of the dough, gently stretch it upward, and fold it toward the center.
Rotate the bowl and repeat this movement on all four sides.
Cover and rest for 20 minutes.
Repeat the stretch-and-fold process two more times, resting for 20 minutes between each round.
After the final fold, the dough should feel smoother, stronger, and more elastic.
3. First Rise
Cover the bowl and leave the dough at room temperature for approximately 60–75 minutes, or until noticeably expanded and airy.
The exact rising time will depend on the temperature of the kitchen.
The dough does not need to perfectly double in size. Look for a puffier appearance and visible air developing beneath the surface.
4. Divide the Dough
Lightly flour the work surface.
Carefully turn out the dough without pressing out all the trapped air.
Using a bench scraper or sharp knife, divide it into 2 equal portions.
Gently shape each portion into a loose rectangle.
Fold the top third toward the center, then fold the bottom third over it.
Cover loosely with a clean kitchen towel and allow the dough to rest for 15 minutes.
This rest relaxes the gluten and makes final shaping easier.
5. Shape the Baguettes
Working with one piece at a time, gently flatten the dough into a long rectangle without completely degassing it.
Fold the upper edge toward the center and press the seam gently with your fingertips.
Fold it once more toward you and seal the final seam.
Place your hands near the center of the dough and roll gently outward, gradually lengthening it into a baguette approximately 14–16 inches long.
Keep the center slightly fuller and gently taper the ends.
Repeat with the second piece.
6. Final Proof
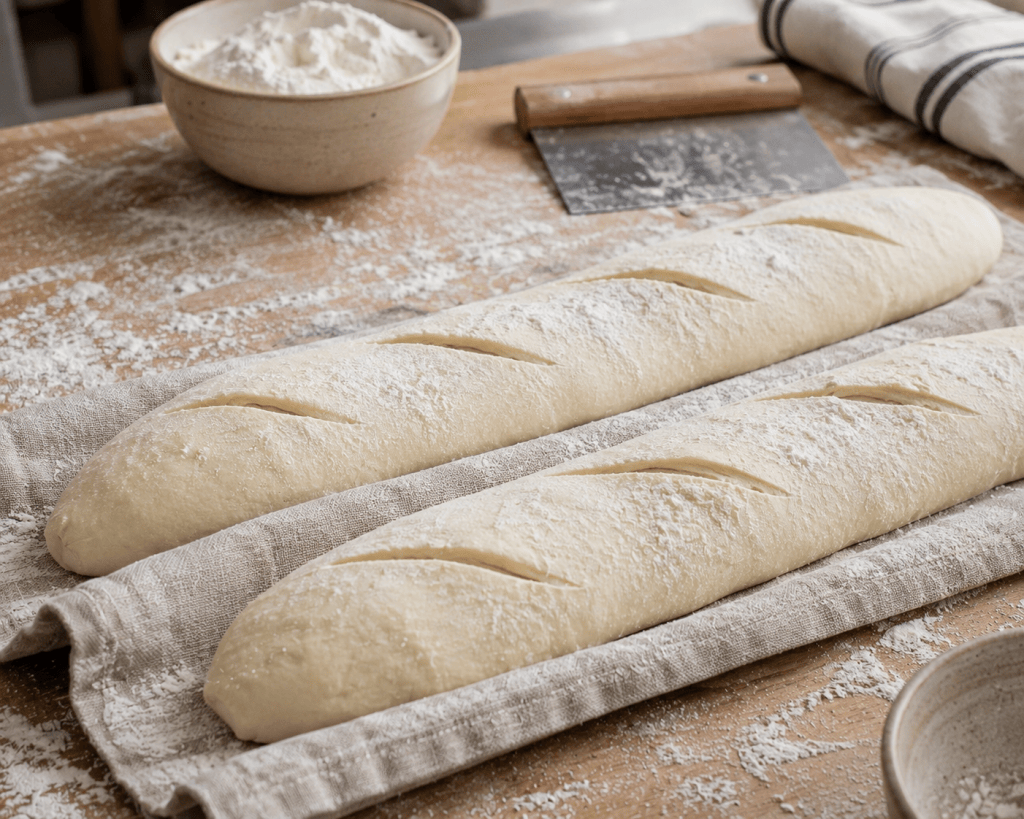
Place the shaped baguettes seam-side down on a generously floured linen towel or parchment-lined baking sheet.
If using a towel, create a small fold of fabric between the baguettes so they support each other without touching.
Cover loosely and let rise for approximately 30–40 minutes.
They should become slightly puffy but should not double in size.
7. Preheat the Oven
While the baguettes are proofing, preheat the oven to 475°F (245°C).
Place a baking stone, baking steel, or heavy baking sheet on the middle rack.
Place an empty metal baking pan on a lower rack. This will be used to create steam.
Allow the oven to heat thoroughly for at least 30 minutes.
8. Score the Baguettes
Carefully transfer the baguettes to parchment paper if necessary.
Lightly dust the tops with flour.
Using a bread lame or very sharp knife, make 4–5 shallow diagonal cuts along each baguette.
The cuts should overlap slightly and run mostly along the length of the loaf rather than straight across it.
Score immediately before baking.
9. Create Steam and Bake
Transfer the baguettes to the hot baking surface.
Carefully pour approximately 1 cup of hot water into the preheated metal pan on the lower rack and immediately close the oven door.
Bake with steam for 10 minutes.
Carefully remove the steam pan if practical, or simply allow the remaining moisture to dissipate.
Reduce the temperature to 450°F (230°C) and continue baking for another 12–17 minutes, until the baguettes are deeply golden brown.
For an especially crisp crust, turn off the oven at the end of baking, crack the door slightly, and leave the baguettes inside for another 3–5 minutes.
10. Cool Before Cutting
Transfer the baguettes to a wire rack.
Allow them to cool for at least 30 minutes before slicing.
Fresh bread continues setting internally after leaving the oven. Cutting it immediately can compress the crumb and make the center seem gummy.
How to Know When Your Baguettes Are Ready
A properly baked baguette should have a firm, deeply golden crust rather than a pale surface.
When tapped underneath, it should sound hollow. The exterior will become even crisper during the first few minutes of cooling.
Inside, look for an irregular crumb with a mixture of small and larger air pockets rather than a perfectly uniform texture.
Tips for Better Homemade Baguettes
Don’t overload the dough with flour. A slightly sticky dough produces a lighter crumb than a stiff, dry dough.
Handle the risen dough gently. Aggressive kneading or pressing after the first rise removes the air you’ve spent time developing.
Preheat thoroughly. A genuinely hot baking surface encourages rapid oven spring.
Score at an angle. Hold the blade at approximately a 30–45 degree angle rather than cutting vertically into the dough.
Steam matters. Moisture during the beginning of baking delays crust formation, allowing the baguettes to expand before the exterior becomes crisp.
Overnight Variation
For deeper flavor, the dough can be fermented slowly in the refrigerator.
After completing the stretch-and-folds, cover the bowl tightly and refrigerate for 8–16 hours.
The next day, allow the dough to sit at room temperature for approximately 30 minutes before dividing and shaping.
The longer fermentation creates a more developed bread flavor and can also make the recipe easier to fit into a busy schedule.
Serving Ideas
Serve the baguette slightly warm with salted butter, olive oil, or homemade jam.
It is also excellent alongside creamy soups, French onion soup, roasted chicken, pasta dishes, or salads.
Day-old baguette can be transformed into garlic bread, crostini, bruschetta, homemade croutons, or French toast.
Storage
Homemade baguettes are at their best on the day they are baked.
Store cooled baguettes loosely wrapped in paper or a clean kitchen towel at room temperature for up to 1 day.
For longer storage, freeze the completely cooled baguettes in freezer-safe wrapping for up to 2 months.
To refresh a baguette, lightly dampen the exterior with water and warm it in a 375°F (190°C) oven for approximately 6–10 minutes.
Frequently Asked Questions
Why is my homemade baguette dense?
Dense bread can result from adding too much flour, insufficient fermentation, overhandling the dough during shaping, or baking before the final proof is complete.
Why didn’t my baguette become crispy?
The oven may not have been hot enough, or there may have been insufficient steam during the beginning of baking. Allowing the finished bread to cool uncovered also helps preserve the crust.
Can I use all-purpose flour?
Yes. Replace the bread flour with the same weight of all-purpose flour. The baguettes will still work, although the crumb may be slightly softer and less chewy.
Can I make baguettes without a baguette pan?
Absolutely. A preheated baking sheet, baking stone, or baking steel works well. A floured kitchen towel can support the baguettes while they proof.
Why do baguettes need to cool before slicing?
The interior is still releasing steam and setting after baking. Cutting too early can leave the crumb sticky and compressed.
Conclusion
Homemade baguettes don’t require complicated ingredients to deliver excellent bread. Flour, water, yeast, salt, patient fermentation, careful shaping, and a hot steamy oven are enough to create baguettes with a crisp golden crust and a soft, airy center.
Once the basic technique becomes familiar, this is the kind of bread recipe that can easily become part of a regular home-baking routine.
 Lea recipes
Leave a comment