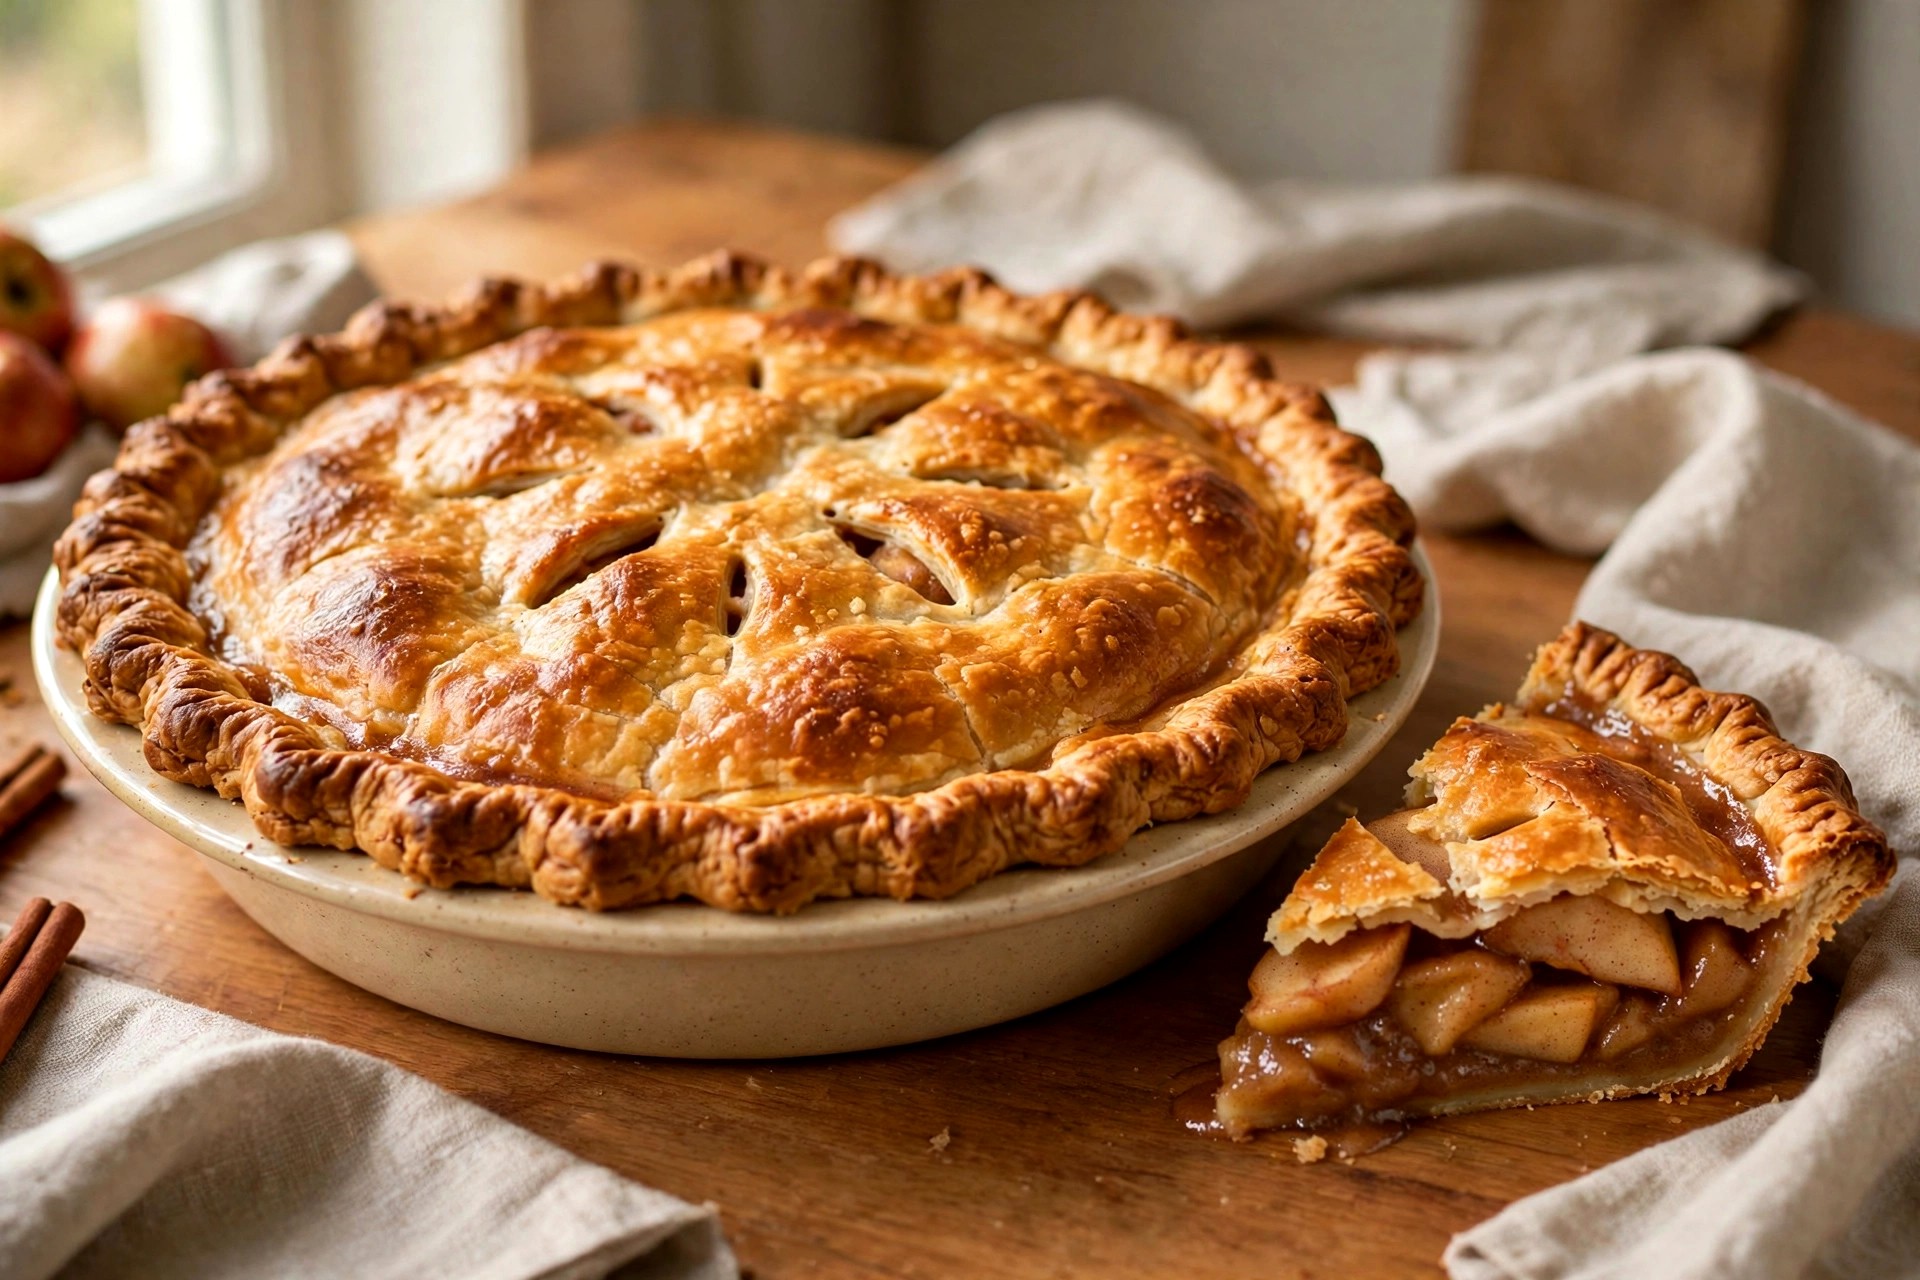
Classic Apple Pie
Prep Time: 45 minutes | Cook Time: 55 minutes | Total Time: 5 hours 40 minutes (45 minutes prep + 1 hour chilling the dough + 55 minutes baking + 3 hours cooling) | Servings: 8 servings
There is a reason Classic Apple Pie keeps landing at the top of America’s Thanksgiving dessert lists, and it is not nostalgia alone. It is the contrast: a shattering, deeply golden all-butter double crust around tender apple slices that hold their shape in a cinnamon-spiced filling thick enough to slice cleanly. No gummy filling, no pale, soggy bottom, no puddle on the plate — just a proper, confident pie that stands up on the fork and tastes like the holiday is supposed to taste.
This version uses two apples on purpose — tart Granny Smith, which holds its shape, and sweet Honeycrisp, which brings the juice — in an all-butter double crust that starts hot at 425°F (220°C), then finishes at 375°F (190°C) so the bottom bakes through. The filling is spiced with cinnamon and a little nutmeg, and thickened with flour so the slices hold. If you are building a whole Thanksgiving table, it belongs beside Classic Sweet Potato Casserole with Pecan Crumble, and the dough is the happiest companion project while this pie cools — one for the pie plate, one for the cookie tin. In fact, my Sugar Cookies with Royal Icing are the perfect make-ahead for the same weekend.
Ingredients
- For the all-butter double crust:
- 2 1/2 cups all-purpose flour (300 grams), spooned and leveled, plus more for rolling
- 1 teaspoon fine sea salt
- 1 tablespoon granulated sugar
- 1 cup unsalted butter (2 sticks, 226 grams), very cold and cut into 1/2-inch cubes
- 1 teaspoon apple cider vinegar
- 6 to 8 tablespoons ice water
- For the apple filling:
- 1 1/2 pounds Granny Smith apples (about 3 medium), peeled, cored and sliced 1/4 inch thick
- 1 1/2 pounds Honeycrisp apples (about 3 medium), peeled, cored and sliced 1/4 inch thick
- 3/4 cup granulated sugar
- 1/4 cup all-purpose flour
- 1 1/2 teaspoons ground cinnamon
- 1/4 teaspoon ground nutmeg
- 1/4 teaspoon fine sea salt
- 1 tablespoon fresh lemon juice
- 1 teaspoon pure vanilla extract
- 2 tablespoons unsalted butter, cut into small pieces
- For the egg wash and finish:
- 1 large egg
- 1 tablespoon whole milk
- 1 tablespoon coarse sugar, for sprinkling
Instructions
- Make the crust dough (20 minutes): in a large bowl, whisk together the 2 1/2 cups flour, 1 teaspoon salt and 1 tablespoon sugar. Add the cold butter cubes and cut them in with a pastry cutter or your fingertips until the mixture looks like coarse crumbs with plenty of pea-sized pieces of butter still visible — those pieces are what bake into flakes. Stir the vinegar into 6 tablespoons of the ice water, drizzle it over the flour mixture and toss with a fork until a shaggy dough just holds together when squeezed; add more ice water, 1 tablespoon at a time, only if dry flour remains. Do not add so much water that the dough feels wet.
- Chill the dough (1 hour): turn the dough out, divide it into 2 equal pieces, and shape each piece into a flat disk about 1 inch thick — flat disks roll out evenly and chill faster than balls. Wrap each disk tightly and refrigerate for 1 hour. This rest is not optional: it firms the butter for a flaky crust, relaxes the gluten so the crust does not shrink back in the dish, and makes the dough far easier to roll without cracking.
- Prepare the filling (15 minutes): in a large bowl, toss the Granny Smith and Honeycrisp slices with the lemon juice and vanilla so every slice is lightly coated. In a small bowl, whisk together the 3/4 cup sugar, the 1/4 cup flour, the cinnamon, the nutmeg and the 1/4 teaspoon salt, then sprinkle this mixture over the apples and toss gently but thoroughly until no dry flour is visible. Let the filling stand while you roll the bottom crust — the sugar starts drawing out the juices now, in the bowl, instead of flooding the bottom crust later.
- Roll and line the dish, then fill (10 minutes): on a lightly floured surface, roll one chilled disk into a 12-inch circle, turning the dough often so it does not stick. Ease it gently into a 9-inch pie dish — lift and settle it into the corners instead of stretching it, because stretched dough is dough that shrinks in the oven. Leave the overhang in place for now. Spoon the apple filling into the crust in an even, mounded layer, pouring over any juices left in the bowl, and dot the top of the filling with the small pieces of butter.
- Add the top crust and finish: roll the second disk into an 11-inch circle and lay it over the filling. Trim both layers of overhang to about 1 inch beyond the rim of the dish, fold the overhang under itself so it sits on the rim, and crimp firmly all the way around with your fingers or a fork — a tight seal keeps the juices in the pie instead of on your oven floor. Cut 5 to 6 small steam vents in the top crust with a sharp knife. Whisk the egg with the milk, brush the whole top lightly with this egg wash, and sprinkle evenly with the coarse sugar.
- Bake in two stages (55 minutes): place the pie on a rimmed baking sheet — the sheet catches any bubble-over and, set on the lower rack, helps the bottom crust bake through. Bake on the lower third rack at 425°F (220°C) for 20 minutes, until the edges are set and lightly golden. Then reduce the oven to 375°F (190°C) and bake for 35 minutes more, until the crust is deep golden brown and the filling is bubbling thickly and slowly in the center vents — that lazy, thick bubbling in the center, not just at the edges, is your sign that the flour has thickened the juices. If the edges brown faster than the center, cover just the rim loosely with foil or a pie shield for the final stretch at 375°F (190°C).
- Cool completely and serve (3 hours): transfer the pie to a wire rack and let it cool for at least 3 hours before slicing — this cooling is part of the recipe, not a suggestion. Warm apple pie slices beautifully only after the filling has had those 3 hours to set; cut it sooner and the thickened juices run straight onto the plate. Slice into 8 pieces and serve at room temperature or just barely warm, exactly as it is or with vanilla ice cream.
Why You’ll Love This Recipe
- A truly flaky, all-butter double crust: cold butter, a short chill and a hot start at 425°F (220°C) give you crisp, layered pastry top and bottom, no soggy base.
- Two apples, better flavor: tart Granny Smith holds its shape while sweet Honeycrisp brings the juice and perfume, so the filling is balanced, never one-note or mushy.
- Slices that hold: the flour in the filling and the full 3 hours of cooling mean clean slices with thickened juices, never a runny puddle.
- Thanksgiving timing that works: the dough and the whole pie can both be made ahead, so on the day the oven does the work at 425°F (220°C), then 375°F (190°C).
Tips from Lea Bennett
- Keep everything cold for a flaky crust: cold butter cubes, ice water, and that full 1 hour of chilling are the whole secret. Pea-sized pieces of butter in the dough are not a mistake — they are the flakes. If your kitchen is warm, chill the flour and the bowl too.
- Never stretch the dough into the dish: a crust that shrinks and slumps in the oven was almost always stretched when it was lined, or rolled too thin at the edge. Lift it, ease it in, and let it settle into the corners.
- Beat the soggy bottom three ways: start the pie on a lower rack on a rimmed baking sheet at 425°F (220°C) so the base gets direct heat — a bake-through, not just a top that colors.
- Slice the apples evenly at 1/4 inch: thick and thin slices in the same pie finish at different moments, so you get crunchy pieces floating in sauce. Even slices, even baking.
- Wait for thick bubbling in the center: edge bubbles lie — the filling at the rim heats first. The pie is truly done at the end of its 35 minutes at 375°F (190°C) when the center vents bubble thickly and slowly.
- Protect the rim, not the whole pie: the crimped edge is thin and sugared, so it colors faster than the center. Check the pie when you lower the temperature and cover just the rim loosely with foil or a pie shield if it is browning too fast.
- Respect the full 3-hour cool: I know — the pie smells incredible and the house is full. But the filling finishes thickening as it cools, and cutting early is the number one reason for a runny slice. Give it the full 3 hours.
Variations
- Lattice top: cut the second disk into 10 strips about 3/4 inch wide and weave them over the filling instead of laying a solid top crust. Brush with the same egg wash and sprinkle with coarse sugar. It bakes a little faster, so start checking the filling at 45 minutes total.
- Dutch crumble top: skip the top crust and cover the filling with a crumble of 1/2 cup flour, 1/2 cup granulated sugar, 1/2 teaspoon cinnamon and 6 tablespoons cold butter, rubbed together until crumbly. Bake as directed.
- Caramel apple pie: drizzle 1/3 cup of thick caramel sauce over the apples before adding the top crust, and finish each slice with a spoonful of warm caramel and a scoop of vanilla ice cream.
- Sharp cheddar crust: a New England classic — work 1/2 cup of finely shredded extra-sharp cheddar into the crust flour mixture before adding the butter. The salty, sharp pastry against sweet cinnamon apples is wonderful.
Make Ahead & Storage
Make ahead (the Thanksgiving way): the dough can be made up to 2 days ahead and kept in the fridge, or frozen for up to 3 months. The whole pie can be baked a day ahead, cooled completely, and kept at room temperature overnight, or refrigerated. Serve it at room temperature, or re-warm it at 375°F (190°C) for 10 to 15 minutes.
Room temperature: a baked fruit pie keeps, covered, at room temperature for up to 2 days. There is no custard or cream to worry about, so the counter is fine.
Fridge: after 2 days, cover and refrigerate for up to 3 more days. The crust softens a little in the fridge, so re-warm slices in a hot oven to bring back the crispness.
Reheating: re-warm individual slices, or the whole remaining pie, at 375°F (190°C) for 10 to 15 minutes, until the filling is hot and the crust is crisp again.
Freezer (baked): freeze the fully cooled, baked pie, tightly wrapped, for up to 3 months. Thaw overnight in the fridge, then re-warm at 375°F (190°C) for 15 to 20 minutes.
FAQ
Why is my apple pie runny?
Almost always one of two things: the pie was cut before its full 3 hours of cooling were up, so the filling had not finished thickening, or the apples were sliced too thick and released too much juice in the oven. Cool it fully, and slice the apples at an even 1/4 inch.
How do I keep the bottom crust from getting soggy?
Use all three safeguards together: bake on a lower rack on a rimmed baking sheet so the base gets strong heat, start hot at 425°F (220°C), and let the filling bubble thickly in the center before you take the pie out. A pie shield for the rim helps too.
What are the best apples for apple pie?
A firm, tart apple plus a firm, sweet one, which is exactly why this recipe pairs Granny Smith with Honeycrisp. Avoid soft apples like Red Delicious and McIntosh — they turn to sauce. Braeburn, Pink Lady and Northern Spy are good swaps if you need one.
Can I make this pie with a store-bought crust?
You can: use a package of 2 refrigerated pie crusts for the 9-inch pie dish, fill and top exactly as written, and bake for the same time. It will still be delicious — the filling is the same — but the all-butter crust is what makes this one special.
How do I know the pie is done, and can I freeze it?
The crust should be deep golden brown all over — not pale blonde — and the filling should bubble thickly and slowly from the center vents, not just at the edges. And yes, you can freeze the fully cooled baked pie, tightly wrapped, for up to 3 months; thaw it overnight in the fridge and re-warm at 375°F (190°C) for 15 to 20 minutes.
More Desserts You’ll Love
- Classic Sweet Potato Casserole with Pecan Crumble
- Sugar Cookies with Royal Icing
- Pumpkin Pie Bars
- Apple Crisp with Oat Topping
- Spiced Pear Cake
Conclusion
A flaky all-butter crust that shatters, tender cinnamon apples in juices thick enough to slice, and a pie that belongs at the center of the Thanksgiving table — that is Classic Apple Pie done right. Make the dough ahead, let it cool the full 3 hours, and serve it with vanilla ice cream and a little patience. Enjoy! 💛
Follow along for a new recipe every day: find me on Facebook at Lea Recipes Kitchen, on Pinterest at @learecipes, and on Instagram @lea_recipes1. If you make this pie, I’d love it if you’d leave the recipe a star rating and a comment — it truly helps other bakers find it. Thank you! 💛

Classic Apple Pie
Ingredients
Method
- Make the crust dough (20 minutes): in a large bowl, whisk together the 2 1/2 cups flour, 1 teaspoon salt and 1 tablespoon sugar. Add the cold butter cubes and cut them in with a pastry cutter or your fingertips until the mixture looks like coarse crumbs with plenty of pea-sized pieces of butter still visible — those pieces are what bake into flakes. Stir the vinegar into 6 tablespoons of the ice water, drizzle it over the flour mixture and toss with a fork until a shaggy dough just holds together when squeezed; add more ice water, 1 tablespoon at a time, only if dry flour remains. Do not add so much water that the dough feels wet.
- Chill the dough (1 hour): turn the dough out, divide it into 2 equal pieces, and shape each piece into a flat disk about 1 inch thick — flat disks roll out evenly and chill faster than balls. Wrap each disk tightly and refrigerate for 1 hour. This rest is not optional: it firms the butter for a flaky crust, relaxes the gluten so the crust does not shrink back in the dish, and makes the dough far easier to roll without cracking.
- Prepare the filling (15 minutes): in a large bowl, toss the Granny Smith and Honeycrisp slices with the lemon juice and vanilla so every slice is lightly coated. In a small bowl, whisk together the 3/4 cup sugar, the 1/4 cup flour, the cinnamon, the nutmeg and the 1/4 teaspoon salt, then sprinkle this mixture over the apples and toss gently but thoroughly until no dry flour is visible. Let the filling stand while you roll the bottom crust — the sugar starts drawing out the juices now, in the bowl, instead of flooding the bottom crust later.
- Roll and line the dish, then fill (10 minutes): on a lightly floured surface, roll one chilled disk into a 12-inch circle, turning the dough often so it does not stick. Ease it gently into a 9-inch pie dish — lift and settle it into the corners instead of stretching it, because stretched dough is dough that shrinks in the oven. Leave the overhang in place for now. Spoon the apple filling into the crust in an even, mounded layer, pouring over any juices left in the bowl, and dot the top of the filling with the small pieces of butter.
- Add the top crust and finish: roll the second disk into an 11-inch circle and lay it over the filling. Trim both layers of overhang to about 1 inch beyond the rim of the dish, fold the overhang under itself so it sits on the rim, and crimp firmly all the way around with your fingers or a fork — a tight seal keeps the juices in the pie instead of on your oven floor. Cut 5 to 6 small steam vents in the top crust with a sharp knife. Whisk the egg with the milk, brush the whole top lightly with this egg wash, and sprinkle evenly with the coarse sugar.
- Bake in two stages (55 minutes): place the pie on a rimmed baking sheet — the sheet catches any bubble-over and, set on the lower rack, helps the bottom crust bake through. Bake on the lower third rack at 425°F (220°C) for 20 minutes, until the edges are set and lightly golden. Then reduce the oven to 375°F (190°C) and bake for 35 minutes more, until the crust is deep golden brown and the filling is bubbling thickly and slowly in the center vents — that lazy, thick bubbling in the center, not just at the edges, is your sign that the flour has thickened the juices. If the edges brown faster than the center, cover just the rim loosely with foil or a pie shield for the final stretch at 375°F (190°C).
- Cool completely and serve (3 hours): transfer the pie to a wire rack and let it cool for at least 3 hours before slicing — this cooling is part of the recipe, not a suggestion. Warm apple pie slices beautifully only after the filling has had those 3 hours to set; cut it sooner and the thickened juices run straight onto the plate. Slice into 8 pieces and serve at room temperature or just barely warm, exactly as it is or with vanilla ice cream.

Leave a Reply