Introduction
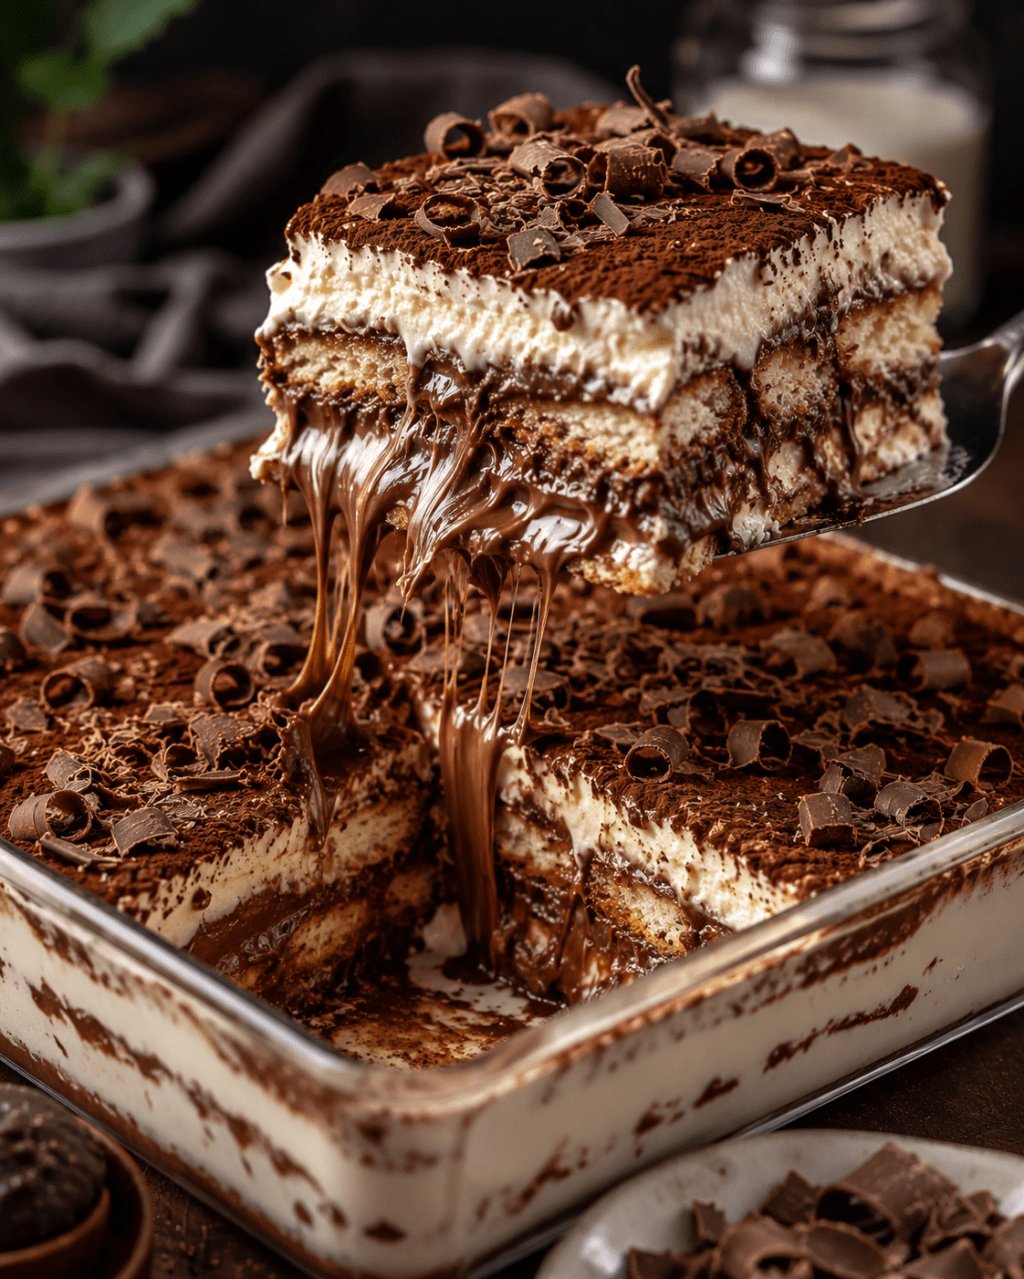
This Chocolate Hazelnut Tiramisu is a decadent no-bake dessert layered with coffee-soaked ladyfingers, fluffy mascarpone cream, and an irresistibly smooth chocolate hazelnut filling.
Each spoonful combines the bold flavor of coffee with creamy mascarpone and rich chocolate, while a generous dusting of cocoa powder and delicate chocolate curls gives the finished dessert an elegant, bakery-style appearance.
Despite its impressive layers, this tiramisu is surprisingly easy to prepare. There’s no baking required, and most of the work is done in about 25 minutes. After several hours in the refrigerator, the ladyfingers soften beautifully and the chocolate and mascarpone layers become perfectly creamy.
It’s an indulgent make-ahead dessert for dinner parties, holidays, birthdays, or any occasion that calls for something extra special.
Why You’ll Love This Recipe
- No baking required: An impressive dessert without turning on the oven.
- Rich chocolate hazelnut flavor: Chocolate hazelnut spread creates an incredibly smooth and decadent layer.
- Classic coffee-soaked ladyfingers: Coffee balances the sweetness and adds traditional tiramisu character.
- Fluffy mascarpone cream: Light, silky, and creamy against the richer chocolate layer.
- Perfect make-ahead dessert: Refrigerating overnight actually improves the texture.
- Beautiful presentation: Cocoa powder and chocolate curls create an elegant finish.
- Feeds a crowd: One 9×13-inch dish makes approximately 10–12 servings.
Ingredient Notes
Chocolate Hazelnut Spread
Your current recipe uses 2 cups (350 g) chocolate hazelnut spread for the chocolate layer.
Combined with warm heavy cream, it becomes much smoother and easier to spread between the delicate tiramisu layers.
Mascarpone
Mascarpone provides the characteristic creamy richness associated with tiramisu.
Your recipe currently uses 250 g mascarpone. Keep it refrigerated until you’re ready to prepare the cream, but avoid aggressively overbeating it because mascarpone can lose its smooth texture.
Heavy Cream
Heavy cream appears in both components: one cup for the chocolate layer and another chilled cup for the mascarpone filling.
The cream used with mascarpone should be very cold so the mixture becomes thick enough to hold distinct layers.
Powdered Sugar
Powdered sugar dissolves easily into the mascarpone mixture without leaving a grainy texture.
The current 1/3 cup is enough to lightly sweeten the mascarpone without competing with the sweeter chocolate hazelnut layer.
Vanilla Extract
A teaspoon of vanilla adds warmth and rounds out the mascarpone flavor.
Ladyfingers
The recipe uses 24 ladyfinger biscuits.
Dip them very quickly into the coffee. If they’re soaked for too long, they can absorb excessive liquid and make the tiramisu watery or difficult to slice.
Strong Coffee
Use strong brewed coffee and allow it to cool completely before dipping the ladyfingers.
For this version, I would keep the recipe alcohol-free; the combination of coffee, chocolate, and hazelnut already gives it plenty of flavor.
Cocoa Powder
Use unsweetened cocoa powder to balance the sweetness of the chocolate hazelnut filling.
For the prettiest finish, I recommend dusting it over the tiramisu shortly before serving.
Chocolate Curls
Chocolate curls or finely shaved dark chocolate give the finished tiramisu a more elegant appearance and add another chocolate texture.
Ingredients
For the Chocolate Hazelnut Layer
- 2 cups (350 g) chocolate hazelnut spread
- 1 cup (240 ml) heavy cream
- Pinch of fine salt, optional
For the Mascarpone Cream
- 8.8 oz (250 g) mascarpone cheese, cold
- 1 cup (240 ml) heavy whipping cream, very cold
- 1/3 cup (40 g) powdered sugar
- 1 teaspoon pure vanilla extract
For the Coffee Layer
- 24 ladyfinger biscuits
- 1 1/2 cups strong brewed coffee, completely cooled
For Topping
- 2 tablespoons unsweetened cocoa powder
- Dark chocolate curls or chocolate shavings
Instructions
1. Prepare the Coffee
Brew the coffee slightly stronger than you normally would.
Pour it into a shallow bowl and allow it to cool completely before assembling the tiramisu.
Do not dip ladyfingers into hot coffee, as they can soften too quickly and become soggy.
2. Prepare the Chocolate Hazelnut Cream
Place the chocolate hazelnut spread in a medium heatproof bowl.
Warm 1 cup of heavy cream in a small saucepan over medium-low heat until hot and steaming but not boiling.
Pour the warm cream over the chocolate hazelnut spread.
Let it sit for about 1 minute, then whisk slowly until completely smooth, glossy, and creamy.
Add a small pinch of salt if desired to balance the sweetness.
Set aside and allow the mixture to cool until slightly thickened but still easily spreadable.
Make the Mascarpone Cream
3. Whip the Heavy Cream
Pour the cold heavy whipping cream into a large chilled mixing bowl.
Beat with an electric mixer until soft to medium peaks form.
Don’t whip it until extremely stiff—the cream should remain smooth and fluffy.
4. Prepare the Mascarpone
In a separate bowl, gently mix the cold mascarpone with the powdered sugar and vanilla just until smooth.
Avoid beating the mascarpone excessively.
5. Combine
Add about one-third of the whipped cream to the mascarpone and gently mix to loosen it.
Then fold in the remaining whipped cream using a silicone spatula.
Use slow, sweeping movements so you don’t knock the air out of the cream.
The finished mascarpone filling should be thick, light, and silky.
Assemble the Chocolate Hazelnut Tiramisu
6. Dip the Ladyfingers
Pour the cooled coffee into a shallow dish.
Working one at a time, dip each ladyfinger very quickly into the coffee—approximately 1 second per side.
Don’t leave them soaking in the coffee.
They will continue absorbing moisture while the tiramisu chills.
7. Create the First Layer
Arrange half of the coffee-dipped ladyfingers in a single layer across the bottom of a 9×13-inch dish.
Break a few ladyfingers if necessary to completely cover the bottom.
8. Add the Mascarpone Cream
Spread approximately half of the mascarpone mixture over the ladyfingers.
Use an offset spatula or the back of a spoon to create an even layer without pressing down too firmly.
9. Add the Chocolate Hazelnut Layer
Spoon approximately half of the cooled chocolate hazelnut mixture over the mascarpone.
Gently spread it into an even layer.
If the chocolate mixture is still very warm, wait before adding it—it could soften the mascarpone cream.
10. Repeat the Layers
Add another layer of quickly dipped ladyfingers.
Spread the remaining mascarpone cream over the top, followed by the remaining chocolate hazelnut mixture.
Smooth the surface gently.
11. Chill
Cover the dish and refrigerate for at least 6 hours.
For the best flavor, texture, and cleanest slices, I recommend refrigerating the tiramisu overnight.
This gives the coffee time to flavor the ladyfingers while allowing the mascarpone and chocolate layers to firm beautifully.
12. Decorate
Shortly before serving, dust the top generously with unsweetened cocoa powder.
Finish with dark chocolate curls or chocolate shavings.
For an especially beautiful presentation, leave some areas of chocolate visible rather than completely covering the surface with cocoa.
13. Slice and Serve
Use a sharp knife to cut the chilled tiramisu into squares.
Wipe the knife between cuts if you want cleaner, more defined layers.
Serve chilled.
Tips for the Best Chocolate Hazelnut Tiramisu
Cool the coffee completely. Warm coffee will soften the ladyfingers too quickly.
Dip, don’t soak. Ladyfingers absorb liquid incredibly fast. A very quick dip is enough.
Keep the whipping cream cold. Cold cream whips faster and holds its structure better.
Don’t overmix mascarpone. Gentle mixing helps maintain a smooth, creamy texture.
Let the chocolate mixture cool. Never pour a hot chocolate layer over mascarpone cream.
Chill for at least 6 hours. The tiramisu needs this time to develop the correct texture.
Overnight is even better. If you’re making this dessert for guests, prepare it the previous evening.
Add cocoa shortly before serving. This gives the surface a fresher and more attractive appearance.
Variations
Dark Chocolate Tiramisu
Replace part of the chocolate hazelnut spread with melted dark chocolate for a deeper, less sweet chocolate flavor.
Extra Hazelnut Tiramisu
Sprinkle finely chopped toasted hazelnuts between the layers and over the top for extra crunch.
Individual Tiramisu Cups
Instead of making one large dessert, assemble the ingredients in individual glasses or dessert cups.
The visible layers make this version particularly attractive for parties.
Strawberry Chocolate Tiramisu
Add a thin layer of sliced fresh strawberries between the mascarpone and chocolate layers.
Espresso Tiramisu
Use strong freshly brewed espresso for a more intense coffee flavor.
Make-Ahead Instructions
This is an excellent make-ahead dessert—in fact, making it ahead improves it.
Prepare and assemble the entire tiramisu the day before serving, cover it well, and refrigerate overnight.
Wait until shortly before serving to add the final cocoa powder and chocolate curls for the freshest presentation.
Storage
Cover leftover tiramisu tightly and refrigerate.
For the best texture and flavor, enjoy it within 3–4 days.
Because the dessert contains mascarpone and heavy cream, don’t leave it sitting at room temperature for extended periods.
Can You Freeze Chocolate Tiramisu?
Yes. Tiramisu can be frozen, although the texture of the cream may change slightly after thawing.
Freeze individual portions in airtight containers for up to 1 month.
Thaw overnight in the refrigerator rather than at room temperature.
For the prettiest result, add fresh cocoa powder and chocolate shavings after thawing.
Frequently Asked Questions
Can I make chocolate tiramisu without eggs?
Yes. This version doesn’t require raw eggs. The mascarpone filling gets its light texture from whipped heavy cream.
Why is my tiramisu watery?
The ladyfingers may have been soaked too long, the coffee may have been warm, or the mascarpone filling may not have been thick enough.
Dip each ladyfinger very quickly and always use completely cooled coffee.
Why is my mascarpone cream runny?
The cream may not have been whipped sufficiently, or the mascarpone may have been overmixed. Use cold ingredients and fold the whipped cream into the mascarpone gently.
How long should tiramisu chill?
Allow at least 6 hours, but overnight chilling gives the best texture and flavor.
Can I make it without coffee?
Yes. For a coffee-free version, you could lightly dip the ladyfingers in cooled chocolate milk instead, although the final flavor will be different from traditional tiramisu.
Can I use regular chocolate instead of chocolate hazelnut spread?
Yes, but you’ll need to make a ganache using chocolate and heavy cream rather than substituting chocolate at the same quantity.
Can I prepare individual servings?
Absolutely. Layer the dipped ladyfingers, mascarpone cream, and chocolate hazelnut filling in glasses or small jars and refrigerate until set.
Conclusion
This Chocolate Hazelnut Tiramisu with Mascarpone and Creamy Chocolate Layers is an indulgent no-bake dessert combining coffee-soaked ladyfingers, airy mascarpone cream, rich chocolate hazelnut filling, cocoa powder, and delicate chocolate curls.
It’s easy enough to prepare at home but elegant enough for holidays, dinner parties, birthdays, or special occasions. And because it tastes even better after chilling overnight, it’s an ideal dessert to prepare ahead of time.
 Lea recipes
Leave a comment