Introduction
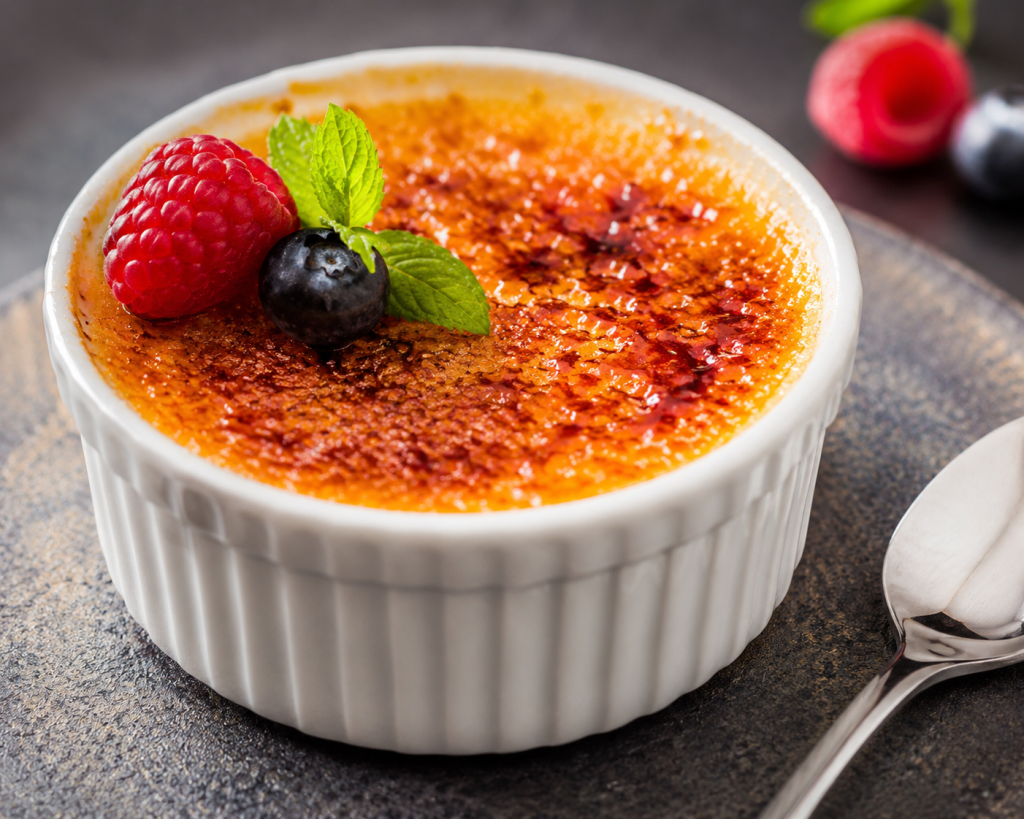
Few desserts feel as elegant as a perfectly made Classic French Vanilla Crème Brûlée. Beneath its thin, glass-like layer of caramelized sugar is an incredibly smooth vanilla custard that is rich, creamy, and delicate.
The magic happens when you tap the golden surface with a spoon and hear that satisfying crack before reaching the chilled vanilla custard underneath.
Your original recipe uses a wonderfully simple base of heavy cream, egg yolks, granulated sugar, vanilla, and salt, finished with sugar caramelized just before serving. This expanded version keeps that classic foundation while giving you more detailed instructions for achieving a silky custard and beautifully crisp caramelized top every time.
Whether you’re preparing dessert for a romantic dinner, holiday celebration, dinner party, or simply want to master a classic French dessert, crème brûlée is surprisingly approachable once you know a few key techniques.
Why You’ll Love This Recipe
- Silky and creamy: The custard is exceptionally smooth and rich.
- Crisp caramelized topping: Every spoonful begins with that signature crack.
- Simple ingredients: You only need a handful of basic ingredients.
- Perfect make-ahead dessert: Prepare the custards the day before and caramelize them just before serving.
- Elegant presentation: Individual ramekins make this dessert naturally beautiful.
- Classic vanilla flavor: Simple enough to let good vanilla shine.
- Perfect contrast: Cold creamy custard underneath warm, crisp caramelized sugar.
Ingredient Notes
Heavy Cream
Heavy cream creates the luxurious texture that defines crème brûlée. Your original recipe uses 2 cups (500 ml), which is an ideal amount for four generous individual portions.
For the best texture, use full-fat heavy cream rather than substituting milk.
Egg Yolks
Egg yolks thicken the custard while keeping it creamy and rich.
Use large eggs and separate them carefully so no egg whites enter the mixture.
Granulated Sugar
Sugar sweetens the custard without overpowering the vanilla.
It is also used separately to create the signature caramelized crust.
Vanilla
Vanilla extract keeps this recipe simple and accessible. For an even more pronounced vanilla flavor, you can use vanilla bean paste or a fresh vanilla bean.
Salt
Just a pinch helps balance the sweetness and enhances the vanilla flavor.
Sugar for Caramelizing
Regular granulated sugar works beautifully for the topping because it melts evenly and forms a thin, crisp shell.
Time and Servings
Prep Time: 15 minutes
Cook Time: 30–35 minutes
Chilling Time: At least 4 hours
Total Time: About 5 hours
Servings: 4
Course: Dessert
Cuisine: French
Method: Water-Bath Baking
Ingredients
- 2 cups (500 ml) heavy cream
- 5 large egg yolks
- ⅓ cup (70 g) granulated sugar
- 1 teaspoon pure vanilla extract
- Pinch of salt
- 3 tablespoons granulated sugar, for caramelizing
Optional for serving:
- Fresh raspberries or strawberries
- Fresh mint
- Extra vanilla bean seeds
Instructions
1. Preheat the Oven
Preheat your oven to 325°F (160°C).
Place four ramekins inside a deep baking dish or roasting pan.
2. Warm the Heavy Cream
Pour the heavy cream into a medium saucepan.
Heat over medium-low heat until the cream is hot and steaming around the edges, but do not allow it to boil.
Remove from the heat.
3. Whisk the Egg Yolks
In a medium mixing bowl, combine the egg yolks, ⅓ cup sugar, vanilla extract, and pinch of salt.
Whisk gently until smooth and combined.
Avoid whisking too aggressively because incorporating too much air can create bubbles on the surface of your custards.
4. Temper the Eggs
While gently whisking the egg mixture, slowly pour in a small amount of the warm cream.
Continue adding the cream gradually while whisking continuously.
This process slowly raises the temperature of the egg yolks and prevents them from scrambling.
5. Strain the Custard
Pour the custard mixture through a fine-mesh strainer into a large measuring cup or clean bowl.
Straining removes any tiny cooked egg particles and helps produce an exceptionally silky crème brûlée.
If foam or bubbles remain on top, gently skim them away with a spoon.
6. Fill the Ramekins
Divide the custard evenly among the four ramekins.
Leave a little space at the top of each ramekin.
7. Prepare the Water Bath
Carefully pour hot water into the baking dish around the ramekins until it reaches approximately halfway up their sides.
The water bath provides gentle, even heat and helps prevent the custard from curdling or cracking.
8. Bake
Carefully transfer the baking dish to the oven.
Bake for approximately 30–35 minutes, as in your original recipe.
The edges should appear set while the centers should still have a slight wobble when you gently move the ramekins.
Do not wait until the centers become completely firm.
9. Cool the Custards
Carefully remove the ramekins from the hot water bath.
Place them on a wire rack and allow them to cool to room temperature.
10. Refrigerate
Cover the cooled ramekins and refrigerate for at least 4 hours, which is also the chilling time used in the original recipe.
For an even better texture, refrigerate them overnight.
11. Prepare for Caramelizing
When you’re ready to serve, remove the ramekins from the refrigerator.
If any condensation has formed on top of the custards, gently blot it away with a paper towel.
This is important because a dry surface helps the sugar caramelize properly.
12. Add the Sugar
Sprinkle a thin, even layer of granulated sugar over each custard.
Tilt and rotate the ramekin gently so the sugar completely covers the surface.
Avoid making the layer too thick.
13. Caramelize the Sugar
Using a kitchen torch, move the flame continuously over the sugar until it melts, bubbles, and develops a deep golden amber color.
Avoid holding the flame in one place for too long.
14. Let the Sugar Harden
Allow the crème brûlée to rest for approximately 2 minutes after torching.
The melted sugar will cool and harden into its signature crisp shell.
15. Serve
Serve immediately while the caramelized topping is crisp and the custard underneath remains cool and creamy.
Crack through the golden sugar crust with the back of your spoon and enjoy.
Tips for Perfect Crème Brûlée
Don’t boil the cream. It should be hot and steaming but not bubbling vigorously.
Temper the eggs slowly. Adding hot cream too quickly can scramble the yolks.
Whisk gently. Too much air creates bubbles that can affect the smooth appearance.
Always strain the custard. This small step makes a noticeable difference in texture.
Use a water bath. Gentle heat is essential for creating a creamy custard instead of something resembling baked eggs.
Don’t overbake. The centers should still wobble slightly when removed from the oven.
Chill thoroughly. Crème brûlée needs several hours to develop its characteristic texture.
Dry the surface before torching. Moisture prevents the sugar from caramelizing evenly.
Use a thin sugar layer. Too much sugar creates a thick crust that can be difficult to crack.
Caramelize immediately before serving. This keeps the sugar shell crisp.
How to Know When Crème Brûlée Is Done
This is one of the most important parts of making crème brûlée.
The outside edges should be set, but when you gently shake the ramekin, the center should still have a subtle jiggle.
Think of the movement of gelatin rather than liquid.
The custard will continue setting as it cools and then becomes perfectly creamy during refrigeration.
If you bake it until completely firm, the final texture may become dense or slightly grainy instead of silky.
Delicious Variations
Vanilla Bean Crème Brûlée
Replace the vanilla extract with one vanilla bean.
Split the bean lengthwise, scrape out the seeds, and add both seeds and pod to the cream while warming it. Remove the pod before combining the cream with the eggs.
Espresso Crème Brûlée
Add 1–2 teaspoons instant espresso powder to the warm cream for a coffee-flavored variation.
Orange Crème Brûlée
Add finely grated orange zest to the cream while heating.
Lemon Crème Brûlée
Fresh lemon zest adds a bright citrus note that contrasts beautifully with the rich custard.
Chocolate Crème Brûlée
Melt finely chopped dark chocolate into the warm cream before tempering the eggs.
Coconut Crème Brûlée
Replace part of the heavy cream with full-fat coconut milk for a subtle coconut flavor.
Make-Ahead Instructions
Crème brûlée is one of the best desserts for entertaining because almost everything can be prepared ahead.
Make and bake the custards up to 2 days before serving.
Once completely chilled, cover each ramekin tightly and keep refrigerated.
Do not caramelize the sugar ahead of time.
Add and torch the sugar shortly before serving so the topping stays beautifully crisp.
Storage
Refrigerator
Uncaramelized crème brûlée can be covered and refrigerated for approximately 2–3 days.
Once the sugar topping has been caramelized, the dessert is best enjoyed immediately.
Over time, moisture from the custard causes the caramelized sugar to soften.
Freezing
Freezing isn’t recommended for the best texture. The custard may become watery or grainy after thawing.
Frequently Asked Questions
Why is my crème brûlée runny?
It may not have baked long enough or may not have chilled sufficiently. The custard needs at least several hours in the refrigerator after baking.
Why did my crème brûlée curdle?
The custard was probably exposed to too much heat. This can happen if the cream boils, the eggs aren’t tempered properly, or the custards are overbaked.
Can I make crème brûlée without a kitchen torch?
Yes. You can use your oven’s broiler, although a torch gives you more control.
Place the chilled ramekins under a very hot broiler for a short time, watching constantly because the sugar can burn quickly.
What sugar is best for crème brûlée?
Regular granulated sugar works very well because its fine crystals create an even layer that caramelizes quickly.
Why isn’t my sugar crust crispy?
The custard surface may have been wet, the sugar layer may have been too thick, or the caramelized desserts may have sat too long before serving.
How far ahead can I make crème brûlée?
The custards can be baked and refrigerated approximately 2 days ahead. Caramelize the sugar just before serving.
Can I use vanilla bean paste?
Absolutely. Vanilla bean paste works beautifully and gives the custard attractive vanilla specks.
Why do I need a water bath?
The surrounding hot water moderates the heat reaching the custard, allowing it to bake slowly and evenly. This helps produce the delicate, creamy texture crème brûlée is known for.
Conclusion
This Classic French Vanilla Crème Brûlée with a Crisp Caramelized Sugar Top proves that an impressive restaurant-style dessert can be made from just a handful of simple ingredients.
Underneath the thin layer of golden caramel is a silky vanilla custard that’s rich without being overly sweet. The contrast between the brittle sugar shell and cold creamy center is what makes this classic French dessert so special.
Prepare the custards ahead of time, chill them thoroughly, then caramelize the sugar just before serving for that unforgettable crack with the first spoonful.
 Lea recipes
Leave a comment