Introduction
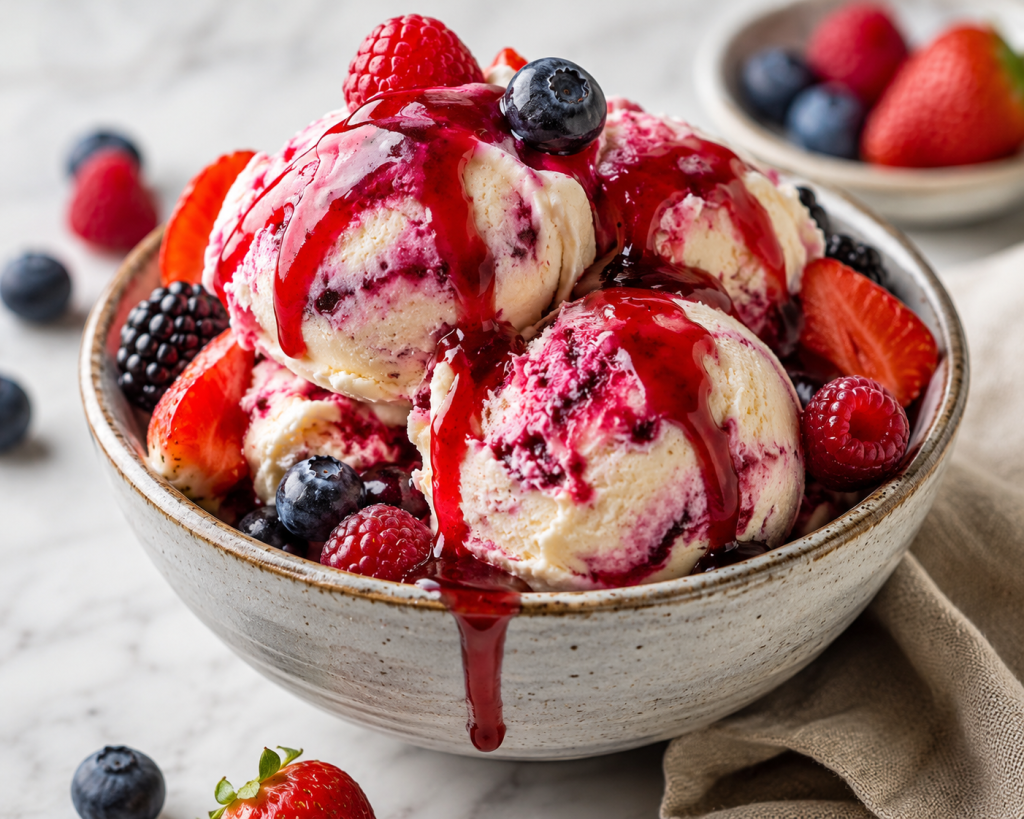
This Creamy Mixed Berry Ice Cream is bursting with real strawberry, raspberry, and blueberry flavor in every scoop. The berries are gently cooked with sugar and lemon until thick and jammy, then folded into a rich vanilla cream base for an ice cream that is fruity, smooth, and beautifully creamy.
Best of all, you don’t need an ice cream maker. A simple whipped-cream base creates a light, scoopable texture, while a homemade berry reduction gives the ice cream a deeper fruit flavor without making it icy.
It’s an easy summer dessert that tastes special enough for entertaining but requires only a handful of simple ingredients.
Why You’ll Love This Recipe
- Packed with real berries: Strawberries, raspberries, and blueberries give every scoop fresh, naturally fruity flavor.
- Extra creamy: Heavy whipping cream and sweetened condensed milk create a rich, smooth texture.
- No ice cream maker required: Just whip, fold, and freeze.
- Not watery or icy: Cooking the berries first removes some excess moisture and concentrates their flavor.
- Beautiful naturally: The berries create a gorgeous pink-purple color without artificial coloring.
- Easy to customize: Change the berry combination or add chocolate, cookies, or a berry swirl.
Ingredient Notes
Mixed berries: Use a combination of strawberries, raspberries, and blueberries. Fresh berries are wonderful in season, but frozen berries work too.
Heavy whipping cream: Use cold cream with around 35% fat. Keeping it very cold helps it whip properly and gives the ice cream its airy, creamy texture.
Sweetened condensed milk: Sweetens the ice cream while creating a rich and smooth no-churn base.
Granulated sugar: A small amount helps the berries release their juices and creates a concentrated berry sauce. Sugar also contributes to a softer frozen texture.
Lemon juice: Brightens the berry flavor and balances the sweetness.
Vanilla: Softens the tartness of the berries and rounds out the cream flavor.
Salt: Just a tiny pinch makes both the berries and vanilla taste more pronounced.
Time & Servings
Prep Time: 20 minutes
Cook Time: 10–12 minutes
Freezing Time: 6 hours minimum
Total Time: About 6 hours 30 minutes
Servings: 8
Ingredients
For the Berry Reduction
- 2 cups mixed berries
- 3 tablespoons granulated sugar
- 1 tablespoon fresh lemon juice
For the Ice Cream
- 2 cups cold heavy whipping cream
- 1 can (14 oz / 396 g) sweetened condensed milk
- 1 teaspoon pure vanilla extract
- Pinch of fine salt
- ¾ cup cooled berry reduction
Optional Berry Swirl
- ¼ cup reserved berry reduction
Instructions
1. Make the berry reduction
Add the mixed berries, sugar, and lemon juice to a medium saucepan.
Cook over medium heat for about 8–12 minutes, stirring frequently and gently crushing the berries as they soften.
The mixture should become noticeably thicker and slightly jammy rather than watery.
This step is important because berries contain a lot of moisture. Concentrating the fruit gives stronger flavor while helping prevent an overly icy finished texture.
Remove from the heat.
For an ultra-smooth ice cream, blend the berry mixture briefly and pass it through a fine-mesh sieve to remove raspberry seeds.
Cool completely before adding it to the cream.
2. Prepare the cream
Pour the very cold heavy whipping cream into a large mixing bowl.
Beat with an electric mixer until stiff peaks form. The cream should hold its shape but still look smooth.
Do not continue beating once it becomes stiff or you risk turning the cream grainy.
3. Prepare the berry base
In another large bowl, whisk together:
- sweetened condensed milk
- vanilla
- salt
- ¾ cup cooled berry reduction
Mix until smooth and evenly colored.
4. Fold everything together
Add about one-third of the whipped cream to the berry mixture and gently fold it in.
Add the remaining whipped cream in two additions, folding carefully with a spatula.
Do not vigorously stir. Keeping as much air as possible in the whipped cream helps give no-churn ice cream its light, creamy texture.
5. Create the berry swirl
Spoon half of the ice cream mixture into a freezer-safe loaf pan or container.
Dot a few spoonfuls of the reserved berry reduction over the surface.
Add the remaining ice cream mixture and another few spoonfuls of berry sauce.
Run a butter knife through the mixture just 2–3 times to create irregular berry ribbons.
Don’t mix it completely—you want visible swirls.
6. Freeze
Smooth the top and cover the container tightly.
Freeze for at least 6 hours, preferably overnight, until firm.
7. Serve
Remove the ice cream from the freezer about 5–10 minutes before scooping.
Serve in bowls or waffle cones with fresh berries if desired.
Expert Tips for Perfect Mixed Berry Ice Cream
Don’t use watery berry purée. This is the biggest mistake I’d avoid. Reduce the berries until they’re concentrated and slightly jammy.
Cool the berries completely. Warm fruit will collapse the whipped cream.
Keep the cream cold. Cold cream traps air much more effectively.
Don’t overmix. Fold gently once the whipped cream is added.
Strain raspberries if you want a premium texture. Removing the seeds makes the finished ice cream noticeably smoother.
Keep the swirl thick. A thin, watery berry sauce can freeze into icy streaks. A reduced fruit swirl freezes much better.
Variations
Strawberry Berry Ice Cream: Use mostly strawberries with a small amount of raspberries.
Triple Berry: Use equal parts strawberries, blueberries, and raspberries.
Blackberry Mixed Berry: Replace some blueberries with blackberries for a deeper berry flavor.
Berry Cheesecake Ice Cream: Fold in small pieces of graham cracker and softened cream cheese.
White Chocolate Berry: Add finely chopped white chocolate just before freezing.
Berry Crumble: Add small pieces of baked oat crumble between the ice cream layers.
Storage
Keep the ice cream tightly covered in a freezer-safe container.
For the best creamy texture and fresh berry flavor, enjoy it within about 2 weeks.
Pressing parchment or plastic wrap directly against the surface before covering can also help protect the surface from ice crystals.
FAQ
Can I use frozen mixed berries?
Yes. Frozen berries work very well. Add them directly to the saucepan and cook until the excess liquid has reduced and the mixture becomes thick.
Do I need an ice cream maker?
No. This recipe is specifically designed as a no-churn ice cream.
Why did my homemade berry ice cream become icy?
The most common problem is excess water from the fruit. That’s why this recipe cooks the berries into a concentrated reduction instead of simply adding a large quantity of raw berry purée.
Can I make it less sweet?
You can slightly reduce the added sugar in the berry reduction, especially with very ripe berries. I wouldn’t substantially reduce the sweetened condensed milk because sweetness isn’t its only role—the balance of sugar also affects how hard ice cream freezes.
Can I leave pieces of berries in the ice cream?
Yes, but keep them small. Large pieces of watery fruit can freeze quite hard. For the creamiest result, use most of the berries as a reduction and keep only a small amount of finely chopped fruit.
Conclusion
Creamy, fruity, and filled with real berry flavor, this Mixed Berry Ice Cream is an easy homemade dessert that doesn’t require any special equipment. Reducing the berries before adding them to the creamy base gives the ice cream a stronger fruit flavor and helps create a smoother texture.
With its natural berry color and beautiful homemade swirls, it’s just as pretty as it is delicious.
 Lea recipes
Leave a comment