Introduction
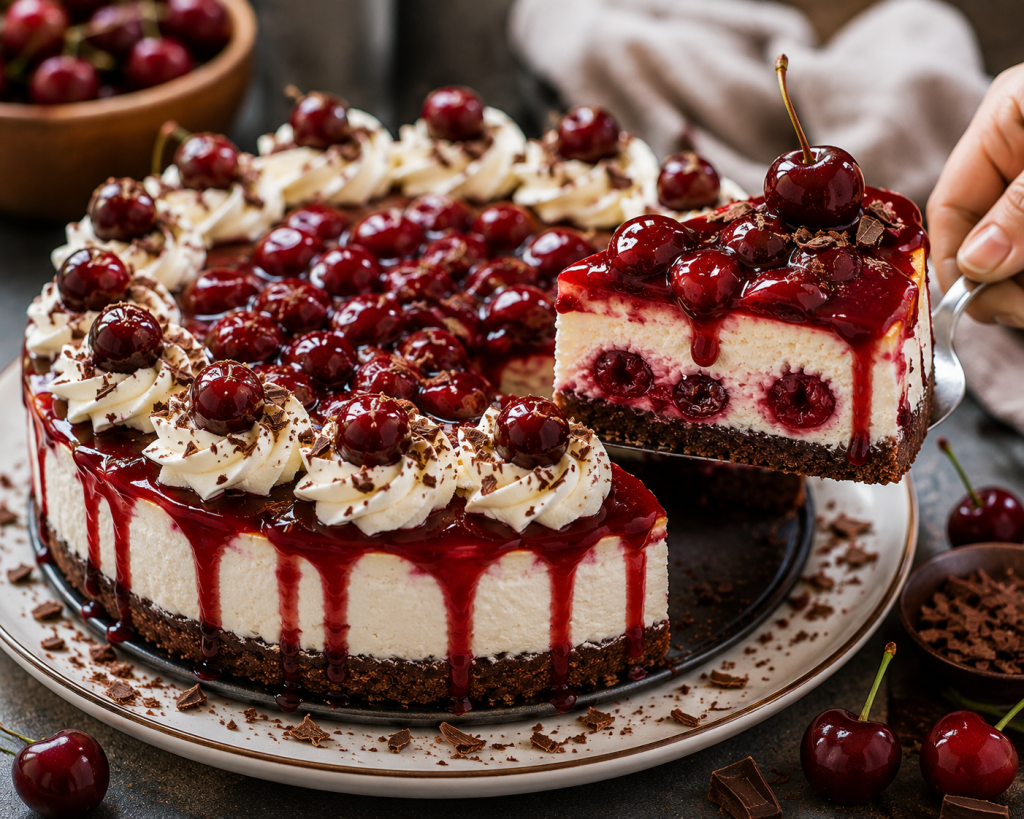
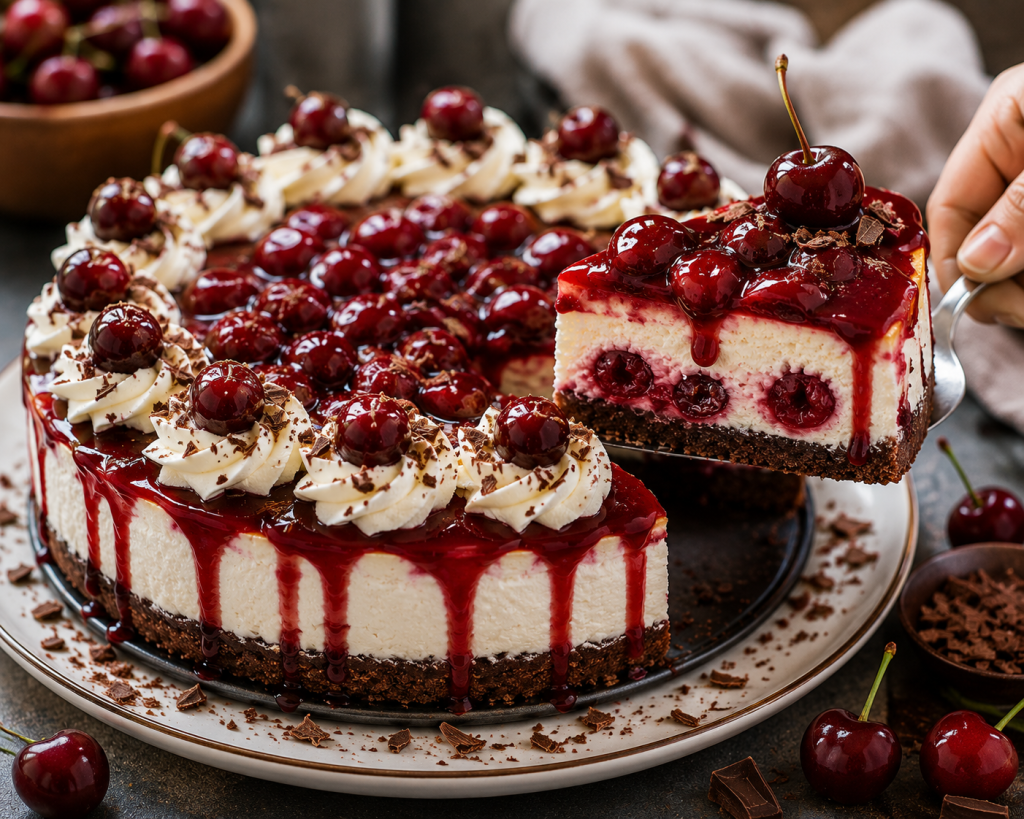
Creamy, rich, and crowned with a glossy cherry topping, this Cherry Cheesecake is the kind of timeless dessert that never goes out of style. Featuring a crisp buttery graham cracker crust, an ultra-smooth cream cheese filling, and a generous layer of sweet cherries, every slice delivers the perfect balance of creamy, fruity, and crunchy textures. Whether you’re celebrating a birthday, hosting a holiday gathering, or simply treating yourself to a homemade dessert, this cheesecake is guaranteed to impress from the very first bite.
What makes this recipe truly unforgettable is its luxurious texture. The filling is incredibly smooth and velvety, made with rich cream cheese, fresh eggs, sour cream, and pure vanilla for a perfectly balanced flavor that’s sweet without being overwhelming. Resting on a buttery graham cracker crust that adds just the right amount of crunch, the creamy filling melts in your mouth while the vibrant cherry topping brings a refreshing burst of fruity sweetness that beautifully complements every bite.
Although cheesecake has a reputation for being difficult to master, it’s surprisingly simple when you follow a few essential techniques. Using room-temperature ingredients, mixing the batter gently, and baking slowly all contribute to a silky texture without cracks. The final result is a bakery-quality cheesecake with a perfectly smooth filling and a sturdy yet tender crust that’s every bit as beautiful as it is delicious.
One of the reasons this Cherry Cheesecake has remained a favorite for generations is its incredible versatility. It’s elegant enough for Christmas, Easter, Thanksgiving, birthdays, bridal showers, baby showers, and dinner parties, yet easy enough to prepare for a relaxing weekend dessert. Better still, cheesecake is one of those desserts that actually tastes even better after chilling overnight, making it an excellent make-ahead recipe for entertaining.
Another reason you’ll love this recipe is how easy it is to customize. Top it with homemade cherry sauce, fresh seasonal cherries, mixed berries, strawberries, blueberries, or raspberries depending on the time of year. Add a hint of lemon zest to brighten the filling, a touch of almond extract to enhance the cherry flavor, or finish each slice with whipped cream for an elegant presentation. No matter how you serve it, the rich cheesecake filling remains the star of the dessert.
Whether you’re baking your very first cheesecake or searching for the ultimate recipe to add to your collection, this Cherry Cheesecake with a Buttery Graham Cracker Crust is guaranteed to become a family favorite. Creamy, smooth, beautifully balanced, and topped with irresistible cherries, it’s a classic dessert that brings elegance, comfort, and unforgettable flavor to every occasion.
Why You’ll Love This Recipe
Ultra-creamy cheesecake with a smooth, velvety texture in every bite.
Buttery graham cracker crust that adds the perfect crisp contrast.
Sweet, glossy cherry topping that beautifully balances the rich filling.
Easy-to-follow recipe that’s perfect for beginners and experienced bakers alike.
An elegant make-ahead dessert that’s even better after chilling overnight.
Perfect for birthdays, holidays, dinner parties, and family celebrations.
Easy to customize with fresh cherries, mixed berries, or your favorite fruit topping.
A classic homemade cheesecake that tastes just like one from your favorite bakery.
Ingredient Notes
Graham Crackers
Crushed graham crackers create the classic buttery crust with a delicious crisp texture. Digestive biscuits or vanilla wafers are excellent substitutes.
Unsalted Butter
Melted butter binds the crumbs together while adding rich flavor and helping the crust bake to a beautiful golden color.
Cream Cheese
Use full-fat cream cheese at room temperature for the smoothest, creamiest cheesecake filling. Avoid low-fat varieties for the best texture.
Granulated Sugar
Granulated sugar sweetens the filling without overpowering the tangy flavor of the cream cheese.
Eggs
Room-temperature eggs blend more easily into the batter and help create a silky, crack-free cheesecake.
Sour Cream
Sour cream adds richness and a subtle tang that balances the sweetness while making the filling incredibly creamy.
Vanilla Extract
Pure vanilla extract enhances the flavor of the cheesecake and complements the sweet cherry topping beautifully.
Lemon Juice
A small amount of fresh lemon juice brightens the filling and enhances both the cream cheese and cherry flavors.
Cherry Pie Filling
Cherry pie filling creates a beautiful glossy topping that’s sweet, fruity, and incredibly easy to prepare. Homemade cherry topping is also an excellent option.
Fresh Cherries (Optional)
Fresh cherries make an elegant garnish and add extra freshness when they’re in season.
Optional Garnishes
Fresh whipped cream
Fresh cherries
Lemon zest
White chocolate curls
Dark chocolate shavings
Mint leaves
Crushed graham crackers
Toasted sliced almonds
Kitchen Tools
A few simple kitchen tools are all you need to make this rich, creamy Cherry Cheesecake.
9-inch springform pan
Food processor or rolling pin (for crushing the graham crackers)
Large mixing bowls
Electric hand mixer or stand mixer
Rubber spatula
Measuring cups and spoons
Small saucepan (if making homemade cherry topping)
Roasting pan (for a water bath, optional)
Cooling rack
Offset spatula
How to Make Cherry Cheesecake
Step 1: Prepare the Crust
Preheat the oven to 325°F (163°C).
Combine the graham cracker crumbs, melted butter, and a little sugar until evenly moistened.
Press the mixture firmly into the bottom and slightly up the sides of a 9-inch springform pan.
Bake for 8–10 minutes, then allow the crust to cool completely.
Step 2: Prepare the Cheesecake Filling
In a large bowl, beat the softened cream cheese until completely smooth and creamy.
Gradually add the sugar and continue mixing until fully incorporated.
Mix in the sour cream, vanilla extract, and fresh lemon juice.
Add the eggs one at a time, mixing on low speed just until combined after each addition. Avoid overmixing to prevent air bubbles.
Step 3: Fill the Pan
Pour the cheesecake batter over the cooled crust.
Smooth the top gently with a spatula.
Tap the pan lightly on the counter to release any trapped air bubbles.
Step 4: Bake
Place the springform pan inside a larger roasting pan.
Carefully pour hot water into the roasting pan until it reaches about halfway up the sides of the cheesecake pan to create a water bath.
Bake for 60–70 minutes, or until the edges are set while the center still has a slight jiggle.
Step 5: Cool Gradually
Turn off the oven and leave the cheesecake inside with the door slightly open for 1 hour.
Remove it from the oven and allow it to cool completely at room temperature.
Refrigerate for at least 6 hours, preferably overnight, for the creamiest texture.
Step 6: Add the Cherry Topping
Spread the cherry pie filling or homemade cherry topping evenly over the chilled cheesecake.
Garnish with fresh cherries, whipped cream, or lemon zest if desired.
Step 7: Slice and Serve
Carefully remove the sides of the springform pan.
Slice with a sharp knife dipped in hot water and wiped clean between each cut for beautiful, bakery-style slices.
Serve chilled and enjoy every rich, creamy bite.
Tips for the Best Cherry Cheesecake
- Always use room-temperature cream cheese, eggs, and sour cream for the smoothest, creamiest filling.
- Avoid overmixing the batter after adding the eggs to prevent excess air, which can cause cracks.
- Bake the cheesecake in a water bath for gentle, even heat and a silky texture.
- Don’t overbake—the center should still have a slight wobble when you remove it from the oven.
- Let the cheesecake cool gradually in the oven with the door slightly open to reduce the risk of cracking.
- Chill the cheesecake for at least 6 hours, but overnight is even better for the perfect texture and flavor.
- Use a sharp knife dipped in hot water and wiped clean between slices for neat, bakery-style servings.
- Add the cherry topping only after the cheesecake has completely chilled to keep it glossy and fresh.
Variations
Fresh Cherry Cheesecake
Replace the canned cherry topping with homemade cherry compote made from fresh sweet or tart cherries.
Chocolate Cherry Cheesecake
Add melted dark chocolate to the filling and garnish with chocolate curls for an indulgent twist.
White Chocolate Cherry Cheesecake
Blend melted white chocolate into the cheesecake filling for an extra creamy, luxurious dessert.
No-Bake Cherry Cheesecake
Skip the baking and prepare a light, creamy no-bake filling chilled until firm before adding the cherry topping.
Mixed Berry Cheesecake
Replace the cherries with strawberries, raspberries, blueberries, or blackberries for a colorful berry version.
Mini Cherry Cheesecakes
Prepare the recipe in a muffin pan lined with paper liners for individual cheesecakes perfect for parties.
Cherry Almond Cheesecake
Add a few drops of almond extract to the filling and garnish with toasted sliced almonds to enhance the cherry flavor.
Storage
Refrigerator
Store the cheesecake covered in the refrigerator for up to 5 days.
Freezer
Freeze individual slices or the whole cheesecake (without the cherry topping if possible) for up to 3 months. Wrap tightly in plastic wrap and aluminum foil before freezing.
Serving Tip
For the best flavor and texture, remove the cheesecake from the refrigerator 20–30 minutes before serving. Add the cherry topping just before serving if it was stored separately.
Frequently Asked Questions
Why did my cheesecake crack?
Cheesecakes usually crack when they’re overmixed, overbaked, or cooled too quickly. Using room-temperature ingredients, baking with a water bath, and allowing the cheesecake to cool gradually will help create a perfectly smooth top.
Can I make Cherry Cheesecake ahead of time?
Absolutely! In fact, cheesecake tastes even better after chilling overnight. Prepare it 1 day in advance, refrigerate, and add the cherry topping just before serving if desired.
Can I freeze Cherry Cheesecake?
Yes. Cheesecake freezes beautifully for up to 3 months. For the best texture, freeze it without the cherry topping whenever possible, then add the topping after thawing.
Can I use fresh cherries instead of cherry pie filling?
Yes! Fresh cherries make an excellent homemade topping. Simply cook them with sugar, lemon juice, and a little cornstarch until thick and glossy.
Do I have to use a water bath?
A water bath isn’t absolutely required, but it’s highly recommended. It helps the cheesecake bake evenly, prevents cracks, and creates an incredibly smooth, creamy texture.
How do I know when the cheesecake is done baking?
The edges should be fully set while the center still has a slight 2–3-inch wobble when you gently shake the pan. The cheesecake will continue to set as it cools.
What can I serve with Cherry Cheesecake?
Cherry Cheesecake is delicious on its own, but it’s also wonderful served with freshly whipped cream, vanilla ice cream, fresh cherries, chocolate shavings, toasted almonds, or a hot cup of coffee or espresso.
How long should Cherry Cheesecake chill before serving?
For the best flavor and texture, chill the cheesecake for at least 6 hours, but overnight is ideal. This allows the filling to fully set and develop its signature creamy consistency.
Conclusion
This Cherry Cheesecake with a Buttery Graham Cracker Crust is the perfect combination of rich, creamy filling, a crisp buttery crust, and a luscious cherry topping that makes every bite unforgettable. Elegant enough for holidays and celebrations yet simple enough for weekend baking, it’s a timeless dessert that’s guaranteed to impress family and friends alike.
With its silky texture, perfectly balanced sweetness, and vibrant fruit topping, this homemade cheesecake delivers bakery-quality results using simple ingredients and easy techniques. Whether you’re making it for a birthday, holiday dinner, or simply to satisfy a dessert craving, it’s a recipe that’s always worth the effort.
Once you take your first bite of this smooth, creamy cheesecake topped with sweet cherries and nestled on a buttery graham cracker crust, you’ll understand why it’s a classic that never goes out of style. Beautiful, indulgent, and irresistibly delicious, this Cherry Cheesecake is sure to become one of your favorite homemade desserts.
Recipe Card
Classic Cherry Cheesecake
This Classic Cherry Cheesecake features a buttery graham cracker crust, an ultra-creamy cheesecake filling, and a luscious cherry topping. Rich, smooth, and perfectly balanced, it’s an elegant dessert that’s ideal for holidays, birthdays, or any special occasion.
Ingredients
For the Crust
- 2 cups (200 g) graham cracker crumbs
- ½ cup (115 g) unsalted butter, melted
- 2 tablespoons granulated sugar
For the Cheesecake Filling
- 24 oz (680 g) cream cheese, softened
- 1 cup (200 g) granulated sugar
- 1 cup (240 g) sour cream
- 3 large eggs
- 1 teaspoon vanilla extract
- 1 tablespoon all-purpose flour
- 1 tablespoon fresh lemon juice
For the Cherry Topping
- 1 can (21 oz / 595 g) cherry pie filling
- Fresh cherries for garnish (optional)
Instructions
- Preheat the oven to 325°F (163°C). Grease a 9-inch (23 cm) springform pan.
- Mix the graham cracker crumbs, melted butter, and sugar until evenly combined.
- Press the mixture firmly into the bottom of the prepared pan.
- Bake the crust for 10 minutes, then let it cool slightly.
- Beat the cream cheese and sugar until smooth and creamy.
- Mix in the sour cream, vanilla extract, flour, and lemon juice.
- Add the eggs one at a time, mixing on low speed just until incorporated.
- Pour the filling over the cooled crust and smooth the top.
- Bake for 55–65 minutes, until the edges are set and the center is slightly jiggly.
- Turn off the oven and leave the cheesecake inside with the door slightly open for 1 hour.
- Refrigerate for at least 6 hours, preferably overnight.
- Spread the cherry pie filling evenly over the chilled cheesecake before serving.
- Garnish with fresh cherries if desired.
Prep Time: 25 minutes
Cook Time: 1 hour 5 minutes
Cooling & Chilling Time: 7 hours
Total Time: About 8 hours 30 minutes
Servings: 12
 Lea recipes
Leave a comment